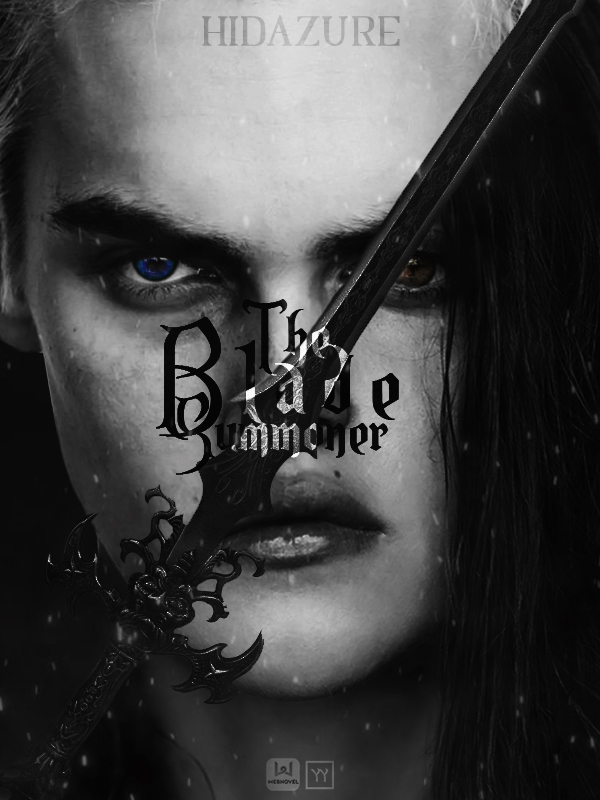
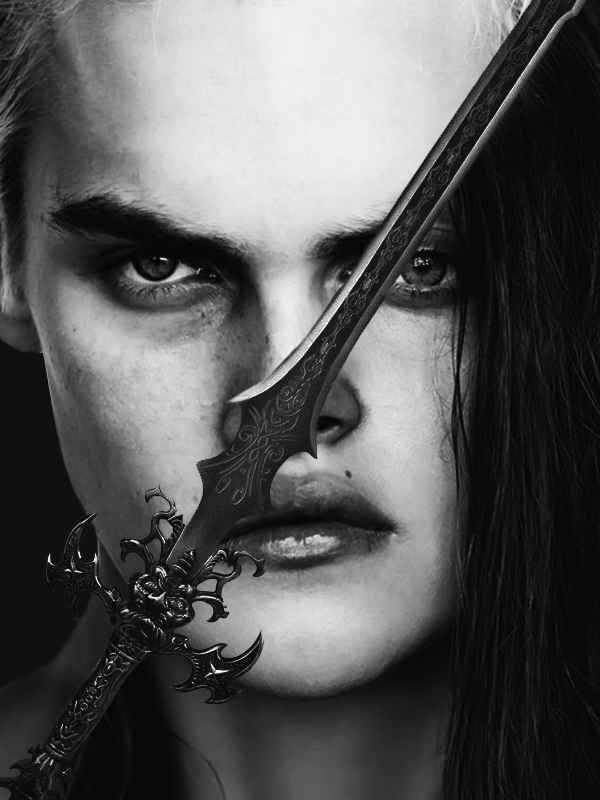
Tutorial #9
Fantasy Genre
Time spent: 2 hours
Total amount of sprites/images used: 6
STEP 1: Place desired images on canvas.
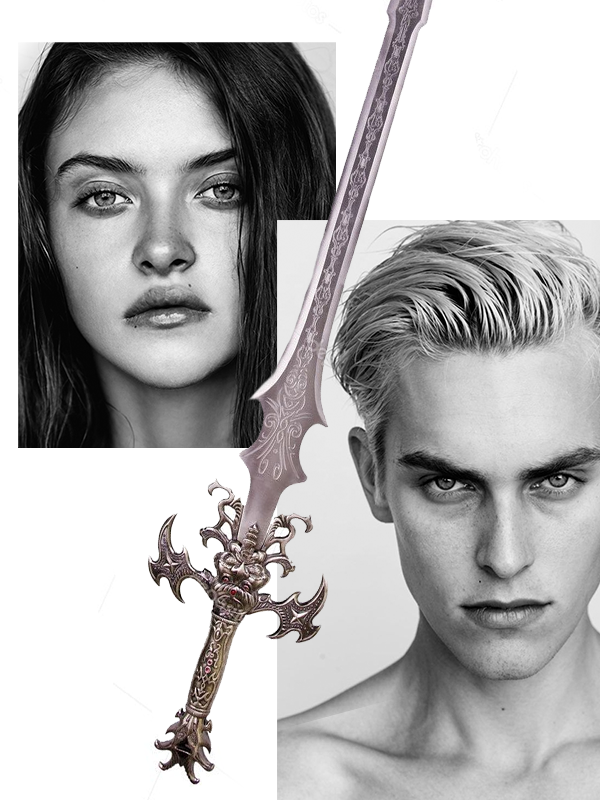
STEP 2: Resize images and clip the image of the girl onto a layer that has content on the bottom half of the sword so it splits half and half.
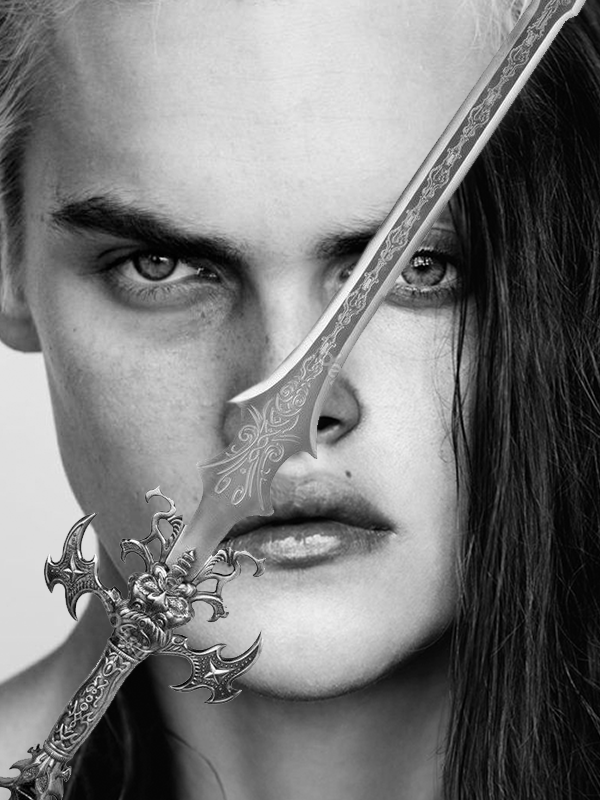
STEP 3: Touch up on things (like the rendering of the sword or turning the background of the guy a dark gray). Also add on a Brightness/Contrast adjustment layer to make the shades pop more.
STEP 4: Add on texturing (sparks for this one that reminded me of some cool magical effect) and eye color for the two. To achieve the color of the eyes, I simply found two images online with the shapes I wanted and cut out the irises. Then, I applied correction layers (Hue/Saturation and Brightness/Contrast and Tone Curve) to get the color I wanted, which was a very vibrant blue and a more toned down brown).
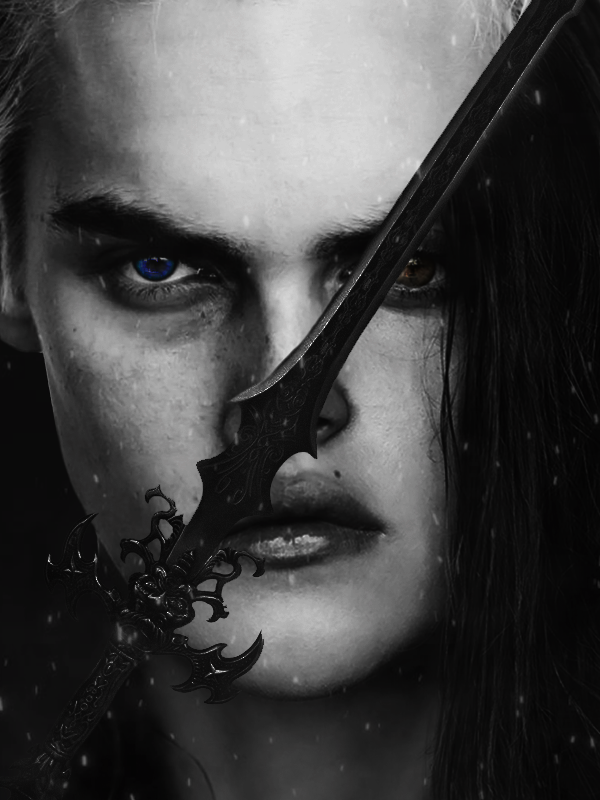
STEP 5: Add text! To make the words stand out, I applied a clipping mask onto the rasterized text layer and used the paintbrush tool to color the section of the words that touch the sword white. You could probably do the same effect with an adjustment layer, but I found clipping to be the easiest. Also put the layer on Overlay and duplicate to add some texture and glow. Use the Dodge & Burn tool to add more dimension and contrast in areas that are needed. As usual, the text is the final step.